Regor's Goldwing Scrapbook
[ Home ] [
Search ] [ About Us
] [ Submit Pics/Docs/Suggestion ]
("Submit" Turned off due to hacking
- Sorry )
Pick from the list below to see an accessory on a Goldwing
↓
↓
Get your tips here
↓ ↓
WingIt
Links
Support your Small
Business Owner
↓ ↓
Vendors
Please Sign
↓ ↓
↓ ↓
Misc Pics
Need your own Web space
1000MB 50GB Web Hosting
for only $9.95/month with no
contracts. PHP4, MYSQL, CGI,
SSH all included.
Click here!
Seat & Backrest
Tips
Back to Tips
Seat Removal
- I don't know if very many of you have had the misfortune of removing
the seat from your wing yet. I did yesterday, (to install the rear
speakers) and I fought for over 1.5 hours trying to get the bolts lined up
again to bolt it back down!! > Here's a couple of hints:
- The rubber bushings in the seat are SUPPOSED to EXTEND into the center of the seat area (there's a small lip around the rubber grommet that aligns with an edge inside the seat area.
- It is VERY EASY to loose the metal spacers that go in the rubber grommets.
- Helpful hint for successfully reinstalling: Make SURE to get the two small tabs at the front underside of the seat hooked under the "tank" first.
- Next, be sure that the "L" shaped hook under the seat engages it's support bar. Last, before wasting a WHOLE LOT OF TIME, use the Phillip's head screwdriver in the tool kit to line up the spacers with the frame.
- After dong this you will find it a great deal easier to insert the
bolt and begin threading it in. I know you will appreciate this, because
I looked in the Owners Manual and there is no mention of seat
removal/replacement at all.
- Try removing the passenger backrest next time. You'll be kicking yourself
when you see how easy the seat goes on and off without it.
- You don't have to REMOVE the passenger backrest, just open up the trunk so
that the backrest is folded forward (as it normally does when you open the
trunk). You'll then be able to get the seat out and in with very little
effort, no pushing and shoving and folding to try to get it to fit in.
- I have had occasion over the past weekend to have the stock seat on and
off several times in an effort to get the sensitivity of the alarm system
"just right". I noticed this evening that I have likely never had
the seat on properly! It is a real struggle to squeeze the seat past the
passenger backrest, both for removal and installation. As a matter of fact,
I discovered tonight that it is nearly impossible to reinstall the seat
"properly" without removing the passenger backrest!
The seat has two fairly small plastic tabs at the front that hook under the front shelter. It also has a larger tab about 6 inches back that is supposed to hook under a cross-member. I could tell from the gouges in this tab, that this tab has been ending up on top of the cross-member instead of hooking underneath it. Try as I might, I could not get this tab to go under the cross-member unless I removed the passenger backrest.
Even with the seat sitting improperly, (with the tab on top of the cross-member) it still can be bolted in place, but of course the driver's seat is deformed by about an inch. Everything actually looks pretty normal, but I think Bagger described it well when he complained of the seat squishing his nards and trying to rearrange his gluts.
Unless you and/or your dealer have been removing the passenger backrest when reinstalling the seat, I would venture to say that it likely isn't sitting properly and you are in essence sitting on a lump.
Backrest Removal
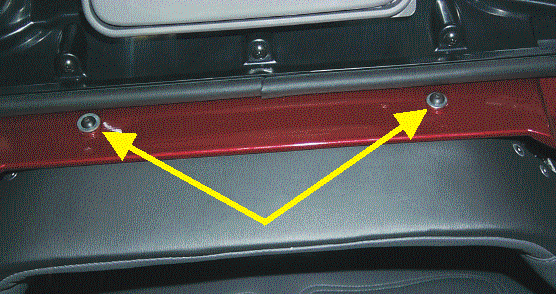
- Open the trunk lid.
- Remove two button head cap screws with 4mm Allen wrench.
- Be cautious not to drop the washers when you remove the screws.
- Close the trunk lid and lift the back rest straight up out of retention slots.
Backrest Gap
It seems that many of the GL1800's have about a 1/2" gap between the top of the trunk and the backrest. Some people have had there backrest replaced under warranty and received a replacement that has the same problem. It appears as though Honda does not have a fix for this problem at this time. The posts below discuss some potential ways to fix the gap.
- Take the
passenger backrest off (remove two screws located on lower part of inner
trunk), remove the staples holding the cover down, use a butter knife and
fingers to pull the glued foam loose, pull the foam up and over the
plastic lip and restaple the cover, do not pull the cover as tight, it will
cause the foam to mash back down. I used a Slim-Line Stapler #800 with 1/4
inch staples, it can be found at most Walmart stores for about $10 bucks.
Results: NO MORE GAP, fits nice and flush.
- Take the guts out of the trunk lid and drill two holes thru' it into the back of the back rest, making 4 holes. Then work a plastic tie, must "V" the end like a fish hook, thru' the holes and pulled tight. 30 minutes from start to finish. Looks just fine.
Bolt Stripping
- If you have not done so, the next time you take off your seat, run a tap through the 4 holes which the seat bolts go into. Honda paints the frame after the threads are applied, therefore the paint balls up in the threads and can cause stripping. Have done it with our shop bike, and no problems since.